Planning Your Basement Remodel
Remodeling your Basement will not only give you a relaxing space to spend time with family and friends, but it can also increase the value of your home. Just like any home renovation project, designing the perfect Basement is a process that requires careful thought and planning.
This guide will walk you through every step of the process, from the visual planning to the hands-on labor, to help ensure you don’t overlook anything while planning your Basement Remodel project. Let’s get started:
Step 1: Evaluate your space
Before you can think about the placement of decorative items, paint colors, or flooring, you need to take a few moments to evaluate your existing space. Think of the elements you want in your basement and where you want them. Do you want to make it into a man cave? Will it be a game room? Think about how you would want yourself and others to use this space.
Next, look over the items that you want to keep, you have to keep, and the items you want to donate or throw away. It may feel unnecessary, but it will save you a lot of headaches once the construction aspect of the project begins.
Keep in mind the items that you will have to keep, no matter how much space they may take. These items include the heater/AC unit and associated ductwork, water heater, well pump, sump pump and pit, electrical panel and wiring, pipes, support columns, and beams.
It’s important to remember while these items will still need to be part of your Basement, you may be able to move them to a new location during the construction process. Just be sure to work with a professional to make sure you choose a logical and realistic location if you decide to move these items.
For example, you’ll need to account for minimum space requirements and for fresh air intake for heaters. Check with your local code officials and establish these requirements for all your units before finalizing your floor plan.
Now that you have visualized your space and checked over items you’ll either keep or remove, you can move on to the next step of your Basement Remodel process.
Step 2: Beams and columns
The next step is to evaluate the fixed items in your Basement. These are items that can’t be moved and thus need to be incorporated into your planning. Home builders aren’t concerned with a basement’s feng shui when placing support beams and columns. But, that doesn’t mean you can’t make them look nice.
Let’s take a look at some solutions for your existing beams and columns:
Support columns are generally unmovable, as they are supporting the weight from above.
Here are some solutions to work around columns:
-
- Solution 1: Box them in and make them look decorative with trim and moldings.
-
- Solution 2: Plan walls so that they incorporate the column inside of the wall.
-
- Solution 3: Design the columns so that they’re part of the room’s environment and vibe.
Beams usually need to stay in place as well, as they span openings and are weight-bearing just like columns.
Here are some solutions to work around beams:
-
- Solution 1: Use the bottom height of beams to establish soffit heights. These soffits can be used to create visually pleasing coved/coffered ceilings.
-
- Solution 2: If ceiling height and design style permits, you can establish a dropped beam pattern across the ceiling of certain spaces to hide the beams.
-
- Solution 3: Again, use the bottom height of the beam to establish your ceiling height, effectively making the beam disappear altogether.
-
- Solution 4: Plan your walls to line up with the beam.
Now that you have covered solutions on how to work around the columns and beams, you can move on to the next step in planning out your Basement Remodel.
Step 3: Waterproofing your basement
The next step is to determine if your basement is waterproofed, i.e. dry. If it’s anything but a resounding “yes” you will need to address this prior to starting your Basement Remodel.
Major signs that indicate you may have a waterproofing issue:
- Watermarks or stains on the floor and/or walls
- Efflorescence on walls or floors
- Musty or moldy smell
- Mold growth on items stored in the space
- Rotten wood framing members; especially those that are in contact with masonry surfaces
- Cracks in the walls or floors
If any of these signs are present, make sure to be diligent in remediating the issues prior to moving forward with your project. The most cost-effective and timely way to address water problems is before you start remodeling your Basement.
It’s best to work with a professional when seeking help in addressing water problems in your basement. Don’t settle for subpar work. Remember, doing a thorough job now can prevent future issues from occurring down the road. Be smart in choosing the professional that fixes your water problems.
Step 4: Developing a floor plan
Now you can start the exciting step of developing a new floor plan for your Basement. Two things that are important to address are your exterior walls and your stairwell walls.
Exterior walls are what cover your foundation walls. The best thing to do is to keep them as far against the outside walls as it allows. This will maximize your usable floor space. Consider items like plumbing and water pipes, electrical wiring, and the need for access panels when planning for the walls. Keep in mind, one of the first interior walls that are generally placed is for the utility room since hiding utilities is typically a priority. Remember to take into account the code requirements for service space in front of and around the units.
Establishing your stairwell is an important aspect of your floor plan. You will need to decide a few things around your stairwell. First, do you want an enclosed or open staircase? Second, how will you utilize the space underneath the staircase? Would you want it to be a closet? Keep in mind, most codes require the underside of the staircase to be drywalled.
After the walls have been placed, take a step back and look at the remaining space. Try not to put up more walls than you need, since too many of them can restrict the usage of the space. Use a roll of masking tape and layout the placement of the interior walls to give you a feel for how the walls will impact your layout. You might also consider hiring a professional interior designer for a professional opinion on how to best utilize the space.
Step 5: Egress
For modern homes, this isn’t an issue since newer homes have a second entryway. This step applies more to older homes that never built a secondary entryway. Depending on the use of your space, you may be required to provide more egress than just two exit points.
If you add a Bedroom to your Basement, it will require its own source of egress to the outside. It could be a door or a window, but this would be an Addition to the main egress points in other parts of the Basement
Many clients ask the question “How can we get out of complying with the code?” and this comes up when we discuss the budget. An additional means of egress to your basement can easily add $5,000 or more to the cost of the project.
In response, we recommend that our clients instead ask “Why would I not want to comply with the code?” These regulations are intended to keep you and your family safe.
Let’s say you are in a situation where you and your family need to get out of the Basement quickly but two of the exits are blocked. Wouldn’t investing in the extra egress make sense? Your family’s protection is a priority and with the addition of egress, it will ensure that your family can get to safety and be protected in case of an emergency.
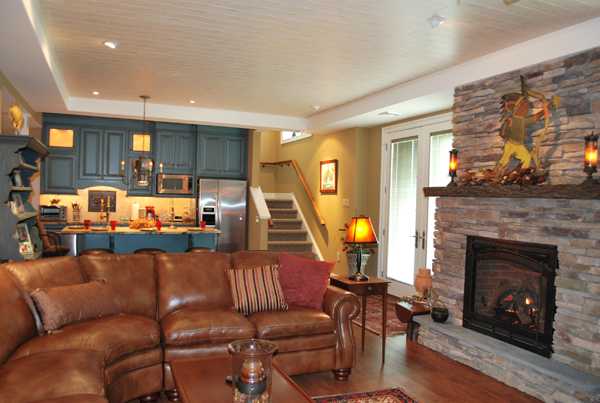
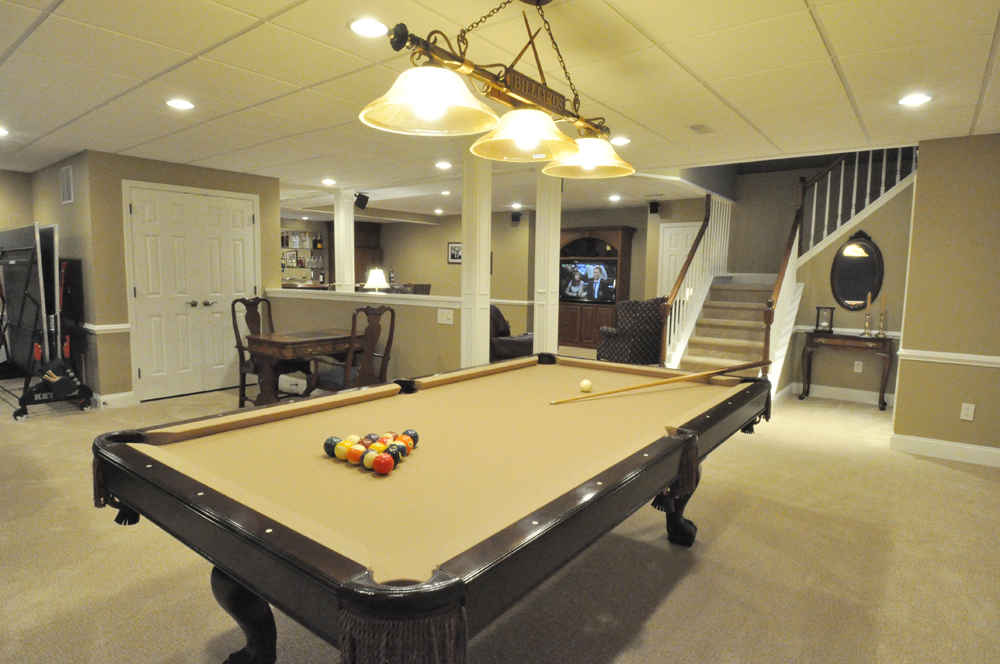
Step 6: Enjoy your new space!
So there you are relaxing in your Kitchen on a Monday morning when you notice that something seems off. You don’t hear hammers, power saws or drills. None of the workers came up to grab some coffee and the fresh batch of cookies you left out is untouched. Then it finally hits you that the carpenters and painters finished the project up on Friday afternoon. Your new Basement is ready to be enjoyed!
Hopefully, the project has been completed just the way you envisioned it would look. After the contractor has handed the project over to you, make sure to take the time and do the following:
- Take a walk through the new Basement with your contract in hand, along with any and all additional work orders. Make sure to note any discrepancies or deviations that need to be addressed.
- Look over any outstanding items that need to be completed at a time yet to be determined. You should receive this detailed list in writing, accompanied by a financial commitment and a timeframe for completion, as well as who is responsible for the completion of each of the outstanding items.
- Visit and look over each space to make sure it’s similar to what you envisioned.
- Enjoy and embrace your beautiful new space! Enjoy the time you spend there, as that’s why you did the project in the first place.
- Throw a grand opening party. Nothing is more rewarding than seeing guests enjoying the environment that you created.
Does this guide have you feeling ready for a Basement Remodel of your own? Contact us today for a free, no-obligation consultation. We’ll be there for you every step of the way so you can be enjoying your beautiful new basement in no time.