
When it comes to starting a project, it can seem like it takes forever to actually see a man doing work. However, when things start rolling, there is little that is as exciting as the rough-in stage.
During this stage, there is a lot of activity. Let’s talk about a few of the initial stages of a remodeling project.
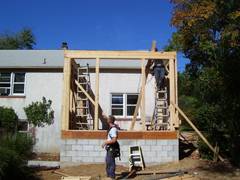
Rough Framing
1. Rough Framing – This is one of the most exciting times. This phase takes you from a blank canvas and gives your project a framework.
At this phase, you can come home every day and see a lot of change.

Rough Roof Framing
The floors, walls and roofs take shape. Windows and doors are installed. Basically, the structure is defined.
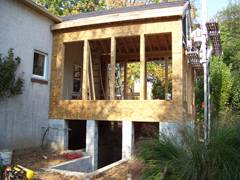
Rough Window Framing
2. Rough Electric – After the framing is completed, you will probably walk through the project with the Project Manager and place the devices and fixtures that are included in the contract.
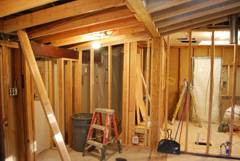
Rough Electrical
Given these locations, the Electrician can go to work running the wiring to all the devices prior to the installation of the drywall.
3. Rough Plumbing – The location of the rough plumbing, hot and cold water supplies as well as the drain and vent lines, is driven by the layout of cabinets in a Kitchen and the location of the main plumbing fixtures in a Bathroom.
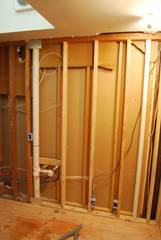
Rough Plumbing
You want to get this right, coordinating with manufacturer’s specifications for the fixtures that you have chosen.
4. Rough HVAC – Given the size and inflexibility of the HVAC supply and return lines, this rough in process should ideally be done first. At the very least, the HVAC contractor should mark out the locations of his work so that the other utility contractors will know where his units and duct work will be run. There is nothing that can delay a project like having to get a contractor back to relocate their work because it is in the way of the HVAC lines.
All that being said, it is very important to coordinate the installation of the utility lines so that rework is kept to a minimum if not eliminated.
Just remember to check and double check your measurements according to the floor plans, cabinet layouts and manufacturer’s specifications prior to allowing drywall to be installed. It is less expensive to move an outlet or fixture location before the drywall is installed rather than after when rework will take hours instead of minutes.
Next Time… Project Log #4 – Time to Insulate
Q&A&C – Questions and Answers and Comments are expected and welcomed.
YOUR STORY – Tell us about your remodeling experiences, good or bad. We all have had them and perhaps you can help someone else have a great remodeling experience or avoid the issues that you encountered. Remember…keep it clean and civil or we can’t publish it.