Some tips on drywall installation…
1. Check for the presence of nailers prior to installing first sheet of drywall.
This prevents you having to stop right in the middle of installation to cut and install a nailer in a corner or ceiling. Nailers provide solid backing for the drywall as not to allow the sheet to flex and or the joints to crack easily.
2. When measuring to cut a sheet to length, check top and bottom of sheet.
Framing can be out of square/plumb, especially in older homes. You want to make sure that your sheet falls as close to the middle of the stud as possible to provide solid nailing for both sheets.
3. Only put out as much adhesive as can be covered by the current sheet.
You don’t want to waste adhesive by gluing up the entire wall and then not getting to it for some reason. Apply adhesive after the piece has been measured and cut and even dry fit if necessary.
Some tips on Spackling…
4. Use fresh spackling as much as possible.
Using the bucket that your father-in-law had left over from 2000 when he did his Kitchen doesn’t save you anything. You will be frustrated by the installation performance of the product. Buy new, use fresh when you can.
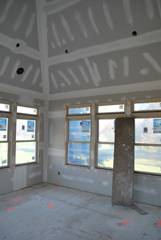
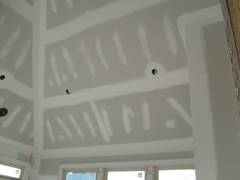
Dry Wall Spackling: 1st Coat
5. Mix spackling prior to using it.
It is always best to thoroughly mix the spackling prior to trying to place it on the wall. This helps to work out any air bubbles as well as giving the material a uniform consistency. You may also add a little water at this point depending on what stage of the process you are in. The first coats can be a little thicker than the last coats. This helps to limit the dry time of the initial coat which tends to be thicker than the last thinner coats.
6. Use the correct knife to install spackling.
Going from a 4” knife initially, all the way up to a 12”-16” knife for the final coats. Using progressively larger knives spreads out the spackling over a larger area and feathers the edges to blend them seamlessly. Make sure you work your paper into a full bed of spackling as not to have air bubbles or paper pulling away from a dry joint. If this occurs, stop and fix it right away as it will not go away with more coats. It is easier to address it sooner than later.

Drywall: Finished Spackling; Wide Smooth Joints; Nail Heads Covered
Drywall: Finished Outside and Inside Corners
7. Avoid sanding as much as possible.
You probably can’t avoid sanding all together, but there are ways to minimize it. Taking your time with each coat and making the spackling as thin as you can, will help to make the joints smooth. You should either lightly sand or use a wet sponge between coats to knock down any high spots or knife marks. Doing this after each coat will make it easier to create a smooth looking wall with no noticeable joints.
8. Last but not least, get your wife involved in spackling.
Studies show that women make better drywall finishers mostly because of their light touch. It might also have to do with the fact that they tend to be a little more patient. And believe me, spackling can try your patience.
Next Time… Project Log #8 – Wall Finishes
Q&A&C – Questions and Answers and Comments are expected and welcomed.
YOUR STORY – Tell us about your remodeling experiences, good or bad. We all have had them and perhaps you can help someone else have a great remodeling experience or avoid the issues that you encountered. Remember…keep it clean and civil or we can’t publish it.